Artist Spotlight
Jennifer Bilton Finds Her Voice Through Art Journaling

Why do you love art journaling?
Art journaling has become a way to document my feelings and thoughts, to combine my passion for words with my passion for art, and to explore art techniques & mediums that excite me. For me, art journaling always stems from myself rather than being about an external event or something totally outside myself which helps me feel in tune with core. It’s helped me find my voice and realize that I do have things to say that matter, that I am an artist because here I am, making art.
Describe your art journaling process.
Usually instead of thinking in terms of materials first, my process starts either in response to a prompt that speaks to me or something “in me” that needs to come out. I think about the materials second, to discover what fits best with the primary idea or content — so that the form (the materials) matches and pushes the content (the ideas that were sparked by the prompt) — usually with a striking magazine image, some paper in my stash, pen, marker, or paint. I still “play” with the materials, but they typically come second in the process, if that makes sense, and the harmony between the words/thoughts of the spread and the materials comes first.
What tips do you have for beginners?
When I’m making an art journal page, or anything, actually, I often have an idea of how I want to start – a magazine image, quote, or color scheme I want to use, for example. – but a huge part of the creative process and creative growth is how you modify your ideas (or “mistakes”) in the moment and see where it takes you. Instead of resisting and trying to force the original idea and instead of giving into negative toxic-thought world, take on an attitude of creative problem solving. So many of my favorite spreads are the result of realizing my initial idea wasn’t panning out and asking “what if I did this instead, or put this here and move this around, or found a new element to use to cover up X,” etc. This creative problem solving will not only serve you on your art journal journey, but also in life, because artistic problem solving is such an important skill.Try letting go of the initial idea of the end result. My favorite part of the process is when I reach a flow state to create something I wasn’t expecting. The mindset is so important, so don’t be afraid to branch off and experiment with the process.
What do you do when you don’t know what to make?
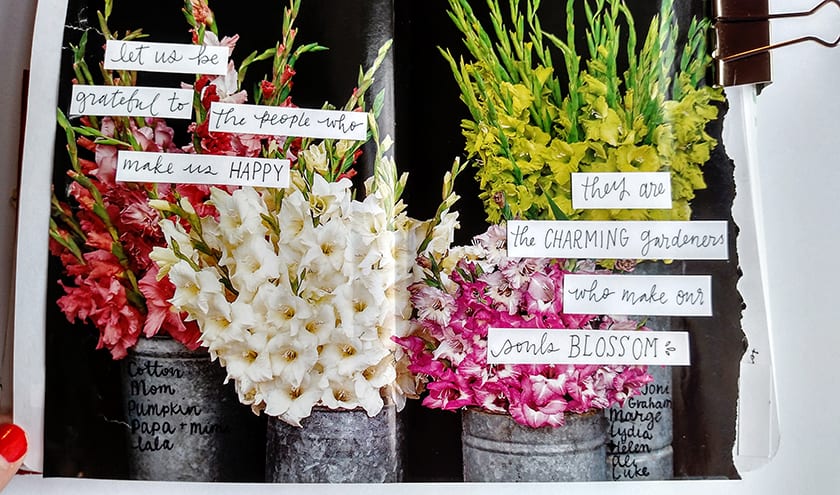
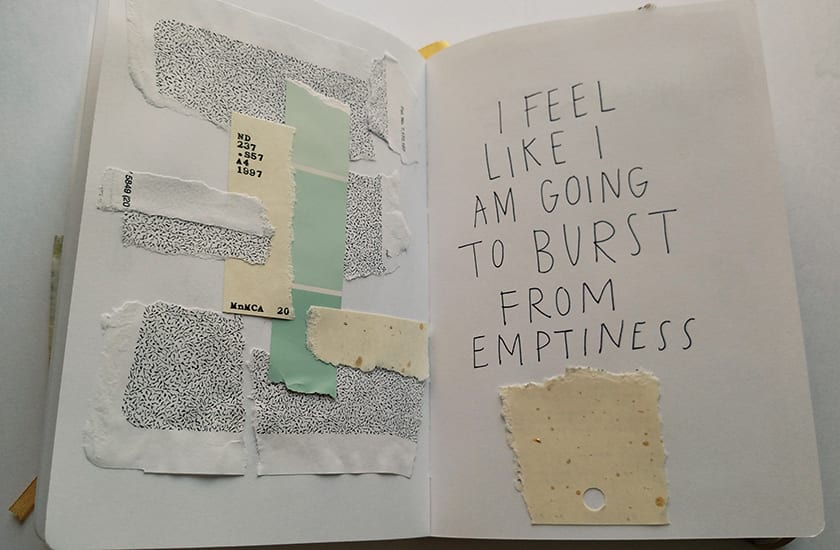
When I don’t know what to do I usually turn to magazine photos. I have an accordion file full of beautiful/inspiring images that I’ve cut out and organized into larger groups like Figures, Flowers, Nature, Artsy, Words, Pretty paper, etc. If I flip through those, one will usually speak to my current mood. Then I’ll glue it down into my journal and interact with it, either with a phrase or a quote or mark making that also speaks for me. One summer when I was in a creative rut, I filled an entire journal this way and it was so freeing not to worry about making an extravagant page – the simplicity of an image that’s already waiting for you can help you figure out what you’re feeling or trying to say. And a few words or a quote from an outside source can also speak for you but still be yours.
What are your must have supplies? What is your journal of choice?
To express myself in art journaling at the most basic level, I need a tape gun roller (which are so much better than wet glue or glue sticks–they’re never sticky enough– for thin papers or magazine images), random ephemera (more about that later), some pens and permanent markers to letter with (my favorite basics are Pigma Microns, black Papermate flair pens, sharpies, Stabilo 88 pens for color, and I also like the very fine .38 and .5 Pilot G-2 pens.) I also love gouache paint, which is like a mix between acrylic and watercolors, for more controlled paint-lettering.
I’ve used gridded Moleskines and Maybooks by May Designs for my magazine image collages and lettering practice. You can choose an incredible range of beautiful and customized covers. Though the paper isn’t suitable for painting I’ve loved them for collaging and basic lettering, and if you glue pages together and prep them they could handle acrylics. I loved working in an altered book for the Season of Words and look forward to getting messy in another old book.
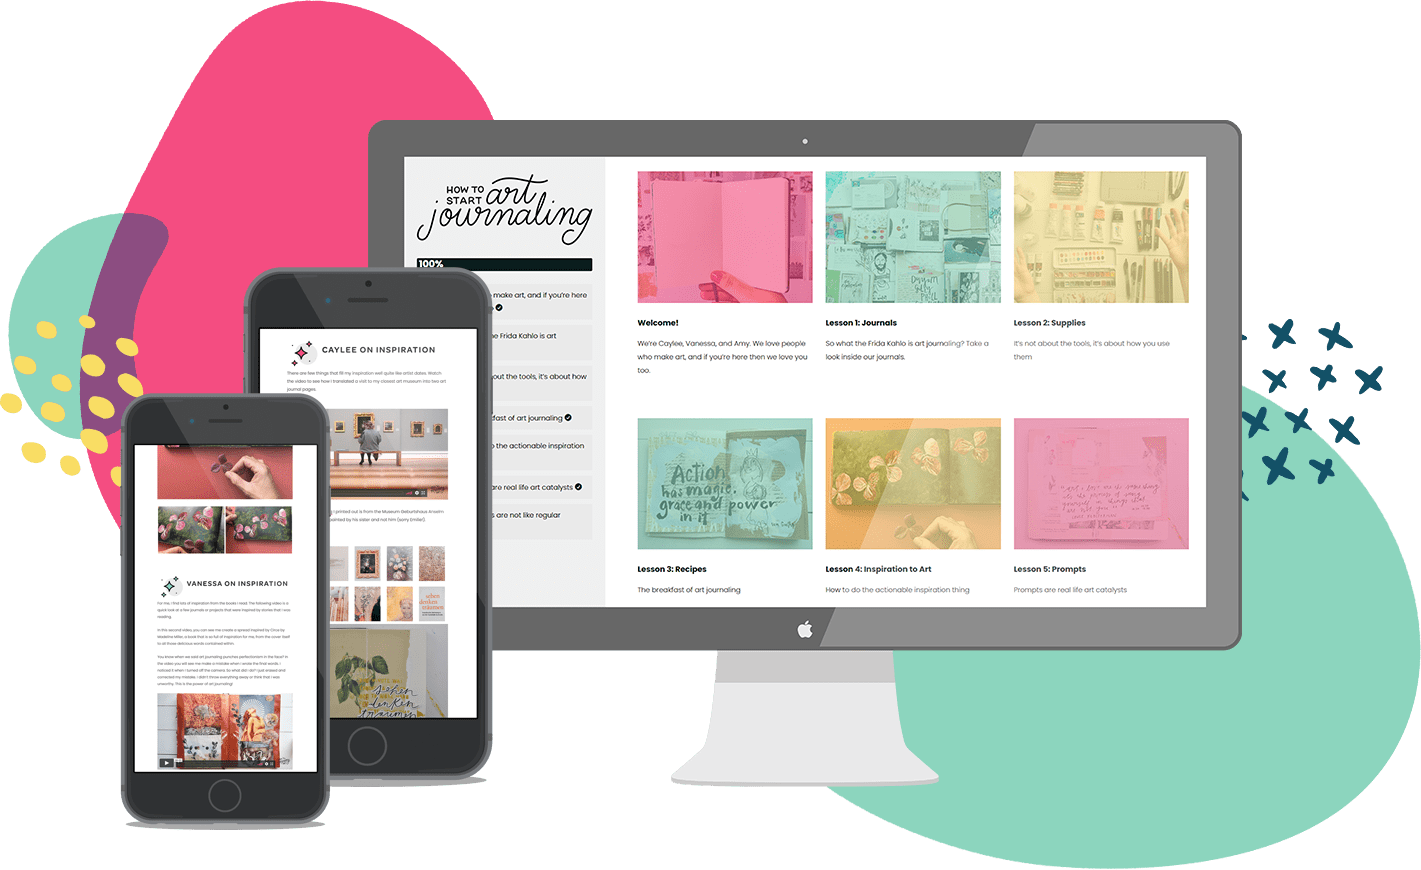
✨ Free class for creatives ✨
In How to Start Art Journaling, we’ll walk you through the art of art journaling, including how to start doing (🙌) and make your very first art journal page (even if you’ve never even opened an art journal before).
Okay. Your lettering is amazing. What tips do you have for someone wanting to try improve theirs? What are your favourite tools to use?
The best way to improve lettering is to study letters and the styles of letters – especially serif vs. sans serif, the upstrokes and downstrokes of script, and block or ‘bubble’ letters.
You don’t need fancy tools — a pencil and black Crayola marker can be a good practice tool and certainly get the job done on their own at times. Pigma Micron pens are great artists quality pens for hand lettering as well as illustration and mixed media. I also love playing with brush lettering using watercolor paint and/ or ink, and round watercolor brushes or a Pentel Aquash pen, (where the barrel for water is built into the brush; similar versions come full of ink) for a fun and relaxed look.
For my hand lettering, I first write out the text to figure out placement and the shape of the letters and then (usually) go back to add weight to the downstroke. Don’t hesitate to sketch out your lettering in pencil first before going over with a pen — pros do it that way. I recommend a kneaded eraser for erasing the pencil after you go over it with ink. After you let the ink dry fully, kneaded erasers are the only ones I’ve found that won’t smear the ink when you erase pencil underneath. When you’re writing, pay attention to the downstrokes — those are the ones that get the added weight. With a marker you can also add more pressure as you draw the downstrokes and lighter pressure as you draw the pen upwards.Thickness on the upstroke alone looks unnatural because it goes against the technique of calligraphic writing.
And PLEASE don’t be afraid to experiment with lettering styles! The weirder the better. It can be fun to throw out the “rules” or ideas of cohesion and uniformity; forget “perfection.” By doing so you can come up with a lettering style that’s uniquely your own!
How do you get messy with stitching? Usually it’s quite a formal medium, but you use watercolours and the most vibrant florals, and ridiculously good looking lettering in yours. Your art is so unique and wildly beautiful. How do you do it?
I taught myself embroidery with Youtube tutorials and one purchased pattern. There are a ton of online resources to learn the basic supplies and stitches that you can use in hand embroidery and in mixed media. Once you learn the foundations then you can get messy with it.
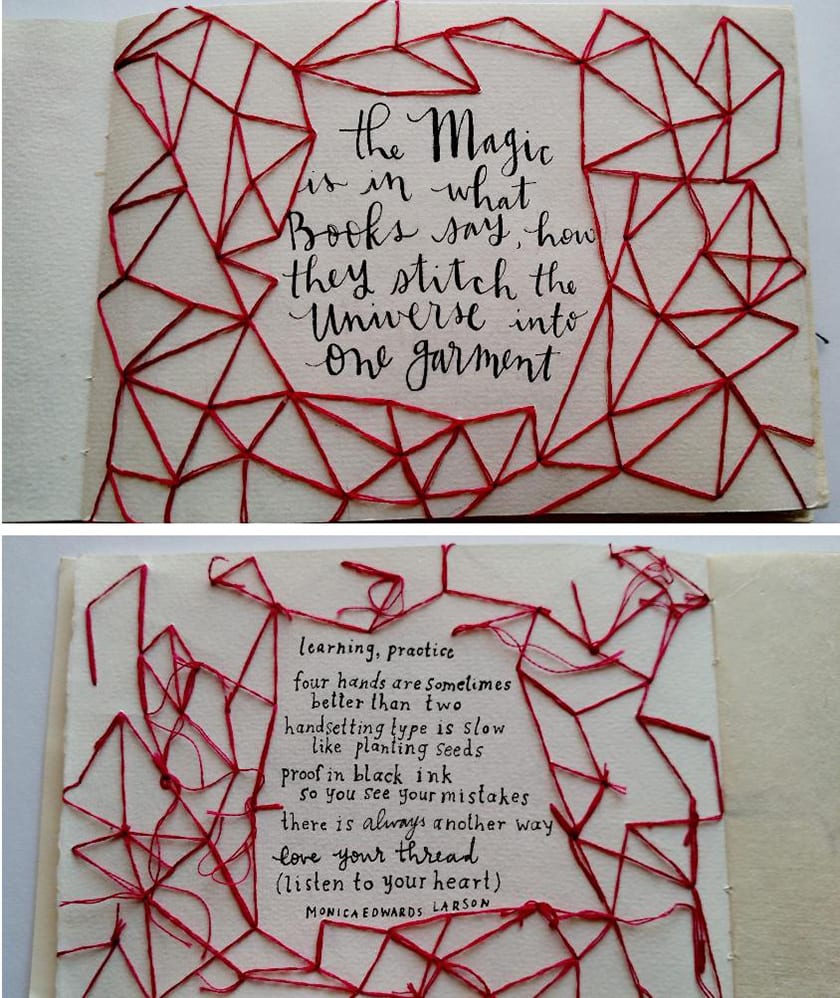
Once I learned the rules I started making it my own, bridging my love for hand lettering by writing with thread instead of just ink. Now I’ve started experiments with watercolor and embroidery, continuing to combine mediums that I love. One way to make embroidery of any kind meaningful or motivating for you is to stitch things you love and marry mediums that you love — books, words, flowers, skulls, coffee cups with beads, markers, paint, paper, the possibilities are endless — and by doing so, you’re bringing something to life in multiple, meaningful and creative ways. Embroidery (search #contemporaryembroidery on IG for huge inspiration) is a remarkably flexible and enduring medium making a true comeback now. There’s so much room and so many ways to experiment.
Some ideas of ways to get messy with stitching on paper — leaving loose ends of thread (not tucking them in or hiding the tails), crossing over from the front to the back “improperly” so the thread goes around the edges of the paper, leaving the stitches fairly loose, ripping holes, mixing different colors of thread strands and sewing with them together, “mark making” with basic stitches to create a pattern or motif, and any other way you can think of breaking “the rules”
We love your minimalist, but detailed, aesthetic. How do you make sure that a page is minimal, and not just empty? How do you make such a clean page that we can look at for ages?
This is kind of funny to me, because I wouldn’t have thought to describe my art journaling style or spreads as “minimalist.” But I suppose since I don’t tend to use deeply layered painted backgrounds collages that qualifies me for the term 🙂
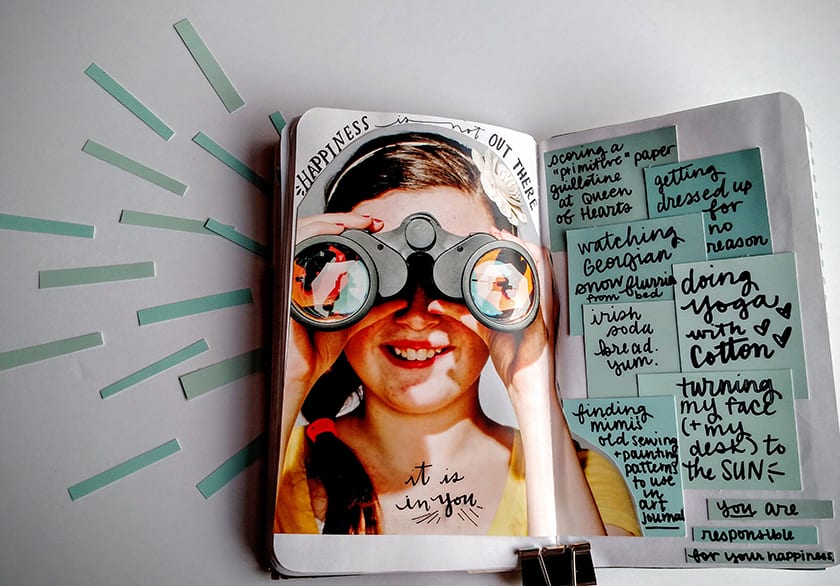
I like to let the images I use speak for themselves; even though I’m quite wordy when it comes to writing or quotes, I like to let any words interact with the image rather than cover it up or overpower it. I think overall my art journaling style comes out quieter as it usually comes from a quieter place within me rather than a louder or bolder place (though rant pages are always fun & therapeutic.)
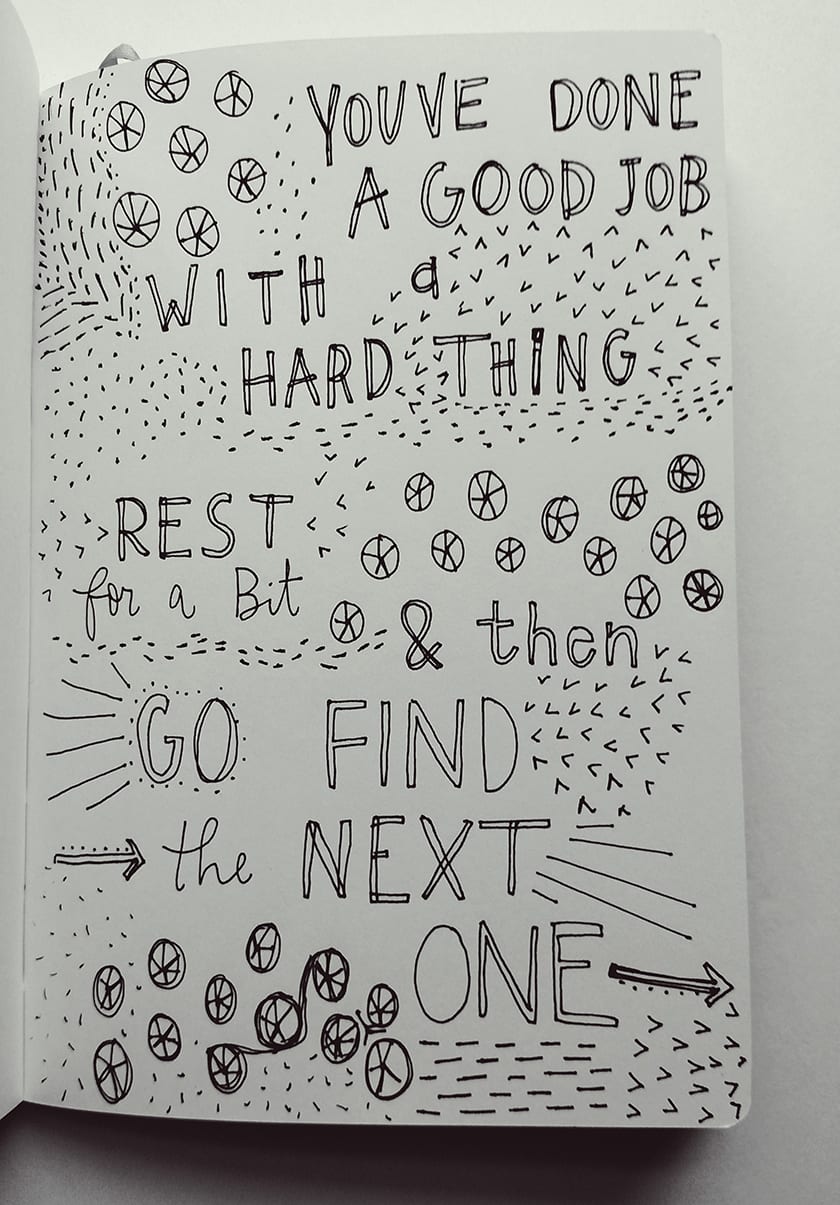
The tone of a page and its message can be represented in the amount of white space, the size and style of text, the colors and patterns. Even though I’m a huge color & pattern lover in real life, lately on paper, I’ve preferred black pen mark making and doodles with subtle patterns, poetic phrases and placement, and images that do double-duty by symbolizing multiple things. Ripped edges of cut out images are also a nice way to add texture and interest rather than straight (or for me, crooked) lines. The ripped edges can tell a story that doesn’t need to be told with words, or adds texture to the surrounding white space that then doesn’t necessarily need to be filled.
Where do you find the ephemera you work with? What are your favourite types to work with, and how do you get it looking like something that is yours rather than a simple loose sheet of paper?
I’m quite a bower bird and collect all sorts of paper ephemera from travels and daily life. I also love going to antique and thrift stores, which are full of ephemera gold. Some of my favorite fodder in addition to magazine and newspaper images are postcards, shopping bag designs, paint samples, book pages, especially dictionary or thesaurus pages & music scores, mail stamps, crossword puzzles to fill in however you want, pretty paper, receipts and stubs, old sewing patterns, vintage store paper ephemera, and pressed flowers. Envelopes are handy too, especially ones from friends that have your name written on them, but you can also label them however you want and stash ephemera, photos, or private journaling in them.
After I gather the ephemera, and I usually only collect ephemera that resonates with me or is personally meaningful, I like to interact with it, letter over it or paint on it, so that it’s more than a random piece of paper and becomes my own.
What tips do you have for someone wanting to put more of her own words on paper? How are you able to just pour everything onto paper?
I’ve always been a word-lover, even before I came to consider myself a writer, but I haven’t always been a journaler. I like to use quotes to spark journaling, as if someone else’s words open up the floodgate to my own. But I also believe you can incorporate words and journaling very simply. A “I AM ____” list or “I AM FEELING: ___ ” list can let you tap into some places to start journaling and feeling attuned to yourself.
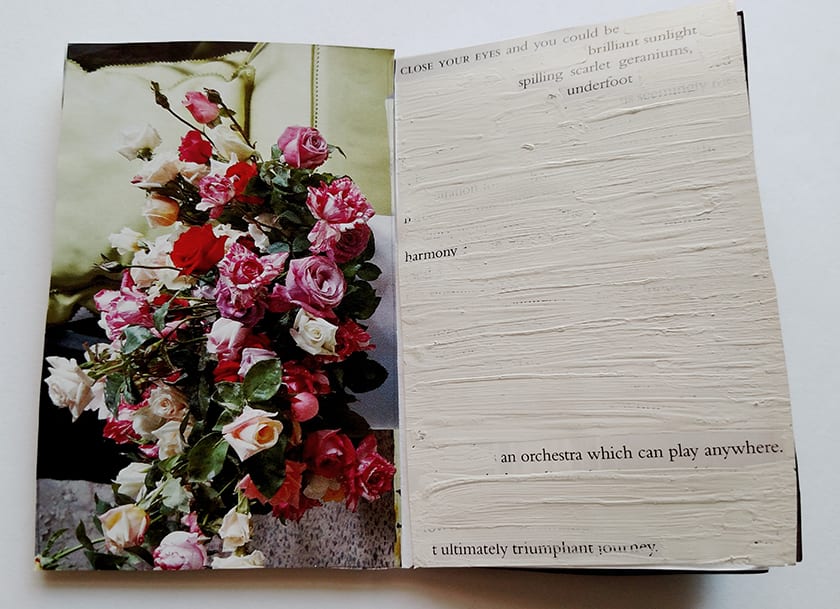
Another technique I love to find new words is white out/black out poetry. I once made some white out poetry from Martha Stewart’s magazine that were called “Handbook” pages and then used white out to turn them into irreverent and sarcastic poems or advice that spoke to my love/hate relationship with perfectly styled homes and lives. Then a week later I made a mini-zine from magazine cut outs and article snippets that I turned into white out poetry that was quite the opposite, and turned an article into really beautiful lines like “Close your eyes and you could be brilliant sunlight, spilling scarlet geraniums, underfoot harmony, an orchestra that can play anywhere, an ultimately triumphant journey.”
📌 Pin this or share in Instagram Stories:
Jennifer Bilton